Saturday, 30 April 2016

BABY PINAFORE DRESS


I've been making loads of things since I found out my daughter was expecting our first grandchild but have only just got around to making her her first dress. I've been dying to do this for ages but I prefer making summer dresses rather than winter ones so now is the perfect time to start despite the current chilly spell.
I have loads of fabric in my stash already but with so much inspiration on pinterest and instagram and with sooooo many beautiful, cute and fun fabric being introduced I can't but help myself but order more!
I discovered some Lewis and Irene  fabric called Bunny Garden and chose the Bunny Wreath on light grey, Pretty Flowers on pink and Leo Bunny on pink.

Bunny Garden by Lewis & Irene


I decided on a pinafore dress pattern from the patterns I already had from when my daughter was small. I wanted the dress to be quite simple because as I want to make so many things I'm all for things that don't take too long to make.  I found a pattern I had traced which I think was from an old Burda magazine. I had bought quite a few of these magazines when my children were small but had thrown them out at some point. However, for some reason I had kept this one.

My granddaughter is now 8 months old but is quite long in the body and lets say, a big big for her age, so she is in clothes for 9-12 months. I chose the 62/68 size because the bigger size seemed so big compared to her measurements and some of her existing clothes.

It has been a very long time since I made a child's dress. Almost 20 years, so I could't quite remember how to stitch the bodice part of a pinafore dress, or at least in what order to do things. When I copied the pattern all those years ago I had only written down a few brief notes so I am so grateful for the internet and YouTube for all those tutorials available for things like this. I found a Youtube video which I must say was brilliant. Without blowing my own trumpet, I know most basic things in most crafts and only need a little reminder every now and again. So when I'm looking for a quick reminder I find some tutorials so frustrating because they seem to go on and on so much about why they do something or what they are using or why, so it takes forever to get to the point or help that I'm looking for. This tutorial by  Melly Sews is brilliant.

I have shared how I made the pinafore below. Maybe some of it will be helpful to someone and please ask if I've missed any stage out or have not explained it well.

Pinafore Tutorial

NB I mainly pin my pieces together and only occasionally tack things in place. If you prefer,  tacking is an option.

Cut out the front and back pattern pieces for the bodice on the fold, once in the top fabric and once in chosen lining


Placing the two front pieces right sides together stitch from the bottom of the arm hole all the way around the neck to the bottom of the other arm hole. Repeat this with the back main fabric and lining. Clip curves. Turn them right sides out and press.


Open out the side seams and pin the seams together (right sides facing) manipulating the seams to make them less bulky, pin and stitch.


Top stitch all around the edges.


Cut out skirt - to make things simple I used a width of fabric. I wanted the matching panties to show so my skirt part was quite short.


If you are happy with the length of your fabric you can hem the bottom edge now.

Using the longest stitch on your machine stitch 2 rows in the seam allowance along the top of the front and back halves of the skirt (gather stitches).


Machine stitch the side seams. Pull the bottom threads of the gather stitches until they match the corresponding bottom edges of the bodice pieces. Pin and stitch making sure the gathers and excess fabric do not ride up and get caught whilst you are sewing.


Stitch button holes on the top of the shoulder sections of either the front or back, depending on your pattern, of the bodice and sew a button on the corresponding strap.


I added a pocket and a bow on the skirt section.


I also made panties which were quite straight forward, following another pattern I had. I cut out two pattern pieces, stitch the front and back seams with right sides facing, then I had to bring the crutch sections together and stitch.


The waist band had to be turned over and stitched leaving a gap to thread elastic through. The same for the leg casings. The pattern gave a guide for the length of both waist and legs. After threading the elastic through using a safety pin and stitching the ends together, the opening had to be sewn closed.


I also made a headband from elasticated lace and a bow made from the Leo Bunny fabric.


I can't wait to try this outfit on my little granddaughter. And I hope it fits! :-)


Zx

Friday, 8 April 2016

FABRIC FROM DOLLY HENRY

Hello, sorry I've been away for so long! Since the news my daughter was expecting our first grandchild I've done nothing apart from sewing and knitting so have got out of the habit of posting on my blog!

There were so many things I wanted to make that all my time was taken up creating blankets, quilts and cardigans. I will get around to sharing them but just for a very quick post I'll show you the most recent thing I created using some fabrics I bought all the way from Australia.


I used spotty fabric from my stash and the ever so cute Little Lamb in blue ( little-lamb-in-blue-bambino-fabric-by-dear-little-world )   and Deer Little Friends (deer-little-friends-bambino-fabric-by-dear-little-world-pink)  with pink polka dots bought from Dolly Henry 

Hope to be back very soon with more of my creations

Zx

Tuesday, 27 January 2015

Fairy Lights!

The other day something caught my eye through the front door window....."Oh" I said to myself  "Thought I had taken down all the Christmas lights from outside!" Then I took a closer look and realised the sun was shining through the dead flower heads of a Hydrangea in my front garden.


The sun shining through Hydrangea in January


It looked magical. What a delight on a cold & windy day in January.

Zx

Thursday, 15 January 2015

The creation of My Craft Room - Part 4 - Filling the shelves

About time I continued telling you about my craft room.

Once I had my cupboards and shelves I needed to fill them with boxes and baskets. I was so excited especially as it would remind me of all of the gorgeous things I had to "play" with!
I sorted things into categories e.g. Woollen fabrics, flannels, felt, christmas prints, stationery etc, etc. Keeping the same things together would make it easier to find (fingers crossed!). I was lucky I could squeeze most of the same thing in one box and generally similar items could be grouped together on nearby shelves or in the cupboards.


I didn't want to be able to see some things through the boxes as they would look messy, so I slipped some patterned paper down the front of these boxes. So that I would know what was in them I used some Cath Kidston sticky labels and a book of Crafty sticky labels (I knew they would come in handy one day!)


I had 4 drawers in the Ikea expedit shelving units to fill. I had to work out what I would need more often so I could just turn around and grab it easily.  I decided to used them for glues & sellotape, tools, rulers & scrap paper.

On some shelves I put my Mollie Makes magazines (I had about 2 years worth) and a few other craft magazines I buy occasionally like Making, Homemaker & Handmade. These magazines aren't cheap so I only buy them if there are several things or ideas in an issue that I could make or use.


Another couple of shelves were reserved for some of my craft books like a few Tilda ones and Cath Kidston Sew, Stitch, Patch,  & her latest "Sewing" (a Christmas present) to name a few. I love books like these and cannot imagine ever having an e-book version.

I have quite a few folders too full of patterns and ideas. The ones that had boring covers got covered in wrapping paper. I used sticky labels on these too. 

I painted some wooden Ikea magazine box files in shades pink, turquoise and aqua. I want to stencil or paint a rose on them but still haven't made my mind up yet what to do. I've had a go with paints on scrap paper but haven't quite found the look I'm after. I also want to finish off a painted chair and stool with the same motif so it's got to be just right. I'll have to give it more thought and do some more searching online for inspiration.

I have a couple of pots (melamine tumblers) that I have put paint brushes and a few pens & pencils in and I bought a cutlery drainer from Dunelm Mill in a gorgeous shade of pink which I use like a desk tidy. It will do until I see something better.


I will review my tins, jars and other containers I've used in a future post but for now here are some photos of my filled shelves and cupboard in my new craft room.


Zx

Sunday, 4 January 2015

My Homemade Christmas Gifts, Makes & Treats

I've been so busy since I came back from London preparing for Christmas I have had no time to sort out photos or write any posts. Firstly, our Christmas was brought forwards by 2 weeks as my family gathered early due to other commitments over the Christmas holiday period. House had to be tidied & cleaned. Food had to bought & meals prepared. Presents to be made. It was all go!


Sewing case


I stuffed a Sass & Belle mini suitcase with selection of sewing goodies for a friends daughter. She loves foxes so I thought this woodland inspired fabric collection called  Fox and Friends by Lewis and Irene, bought from Nature's Threads quilting store, was just perfect. I used some to make a needle case, pin cushion and scissor case. Inside the needle case I added some needles, pins, safety pins & needle threader. I put in some plain natural coloured fabric, a select of felt squares, embroidery threads, a bag of fancy threads & ribbons, a card of buttons, a length of bobble trim, reel of cotton, some wadding and a tape measure. I coordinated the colours the best I could in browns, greens, oranges, yellow and russet to go with the Fox and Friends fat sixteenths.  


Handmade needle case, scissor case & Hedgehog Pincushion
 I plan to post details on how I made the needle case, scissor case and Hedgehog pin cushion at a later date.
The recipient was really thrilled with my gift to her and said she can't wait to make something. 

Cath Kidston and Alice in Wonderland inspired charm bracelets

 These charm bracelets were for my sons girlfriends and again, I intend to do a post showing how I put them together. They are fun to make when they are themed. The 2 chokers at the top of the picture just had a couple of star charms added to make them a little different. These were just little stocking fillers.


Bedding accessories for a Princess!
 A four year old little girl got a Fairytale play castle for Christmas and as the furniture looked a little uncomfortable I made mattresses for the cot and bed, a lace trimmed pillow, a knitted blanket and a quilt. I also made a baby from a wooden dolly peg.

Cute reindeer gift bag, tea towel apron and a little black dress

I also made a gift bag for four year old Eva with a cute felt Rudolph reindeer appliquéd on it. This was made using the fabric from 3 Christmas tea towels bought a few years ago, some red bobble trim and 4 big black buttons. I had also promised to make her an Eva sized apron. As time was running out I made one very quickly out of flowery tea towel. A tutorial will follow shortly as it was so easy.

I will also show you in another post more about the little black dress made for my daughter for New Year's Eve.


Maple & Pecan & Lemon Drizzle Cupcakes and Cranberry & White Chocolate Loaf
Finally, as well as the usual Christmas food - Turkey, stuffing, cranberry sauce, pigs in blankets etc,etc - I made Maple & Pecan cupcakes with butterscotch icing topped with a half a Pecan and Lemon Drizzle cupcakes with lemon buttercream icing topped with snowflakes for our first family gathering. For our second Christmas for those of us left, I made mince pies, an Orange version of the Lemon drizzle cupcakes and a Cranberry & White Chocolate loaf with vanilla buttercream topped with fondant snowflakes.

We also held our usual annual New Year's Eve gathering with friends at our house this time so the cooking didn't stop there! My "star" of a husband cooked several indian dishes whilst I was left to the tidying & cleaning, laying the table, the decorations and the desserts. I made Raspberry and Milk Chocolate Cheesecake and Chocolate Chip Panettone Bread & Butter Pudding. As so much was going on I forgot to take photos!

Wishing you all a very Happy New Year
(I'm just going to put my feet up for a while! :-) )

Zx

Friday, 28 November 2014

COUNTRY LIVING CHRISTMAS FAIR LONDON 2014

A couple of weeks ago I spent a fabulous (and tiring) few days in London with my daughter.

We had a very, very stressful start to our journey by finding there were no spaces left in the station car parks. The station is quite remote with only a few side roads around which either have double yellow lines or any parking spaces all taken up too. Panic started to kick in. Luckily, after asking a couple of ladies, we found a private car park which actually worked out a lot cheaper.

After dumping our bags in our hotel room & Oyster cards topped up, off to Covent Garden we went with Cath Kidston being our first port of call. To me its like being in a sweetie shop. I find it so overwhelming  seeing the products in the "flesh", So much to see, so much to choose from, so much I want! I had to be sensible & tell myself "I don't need another one". So... I came away with another mug, another shopping bag and some cup cake cases. I think I was quite restraint!

Cath Kidston purchases


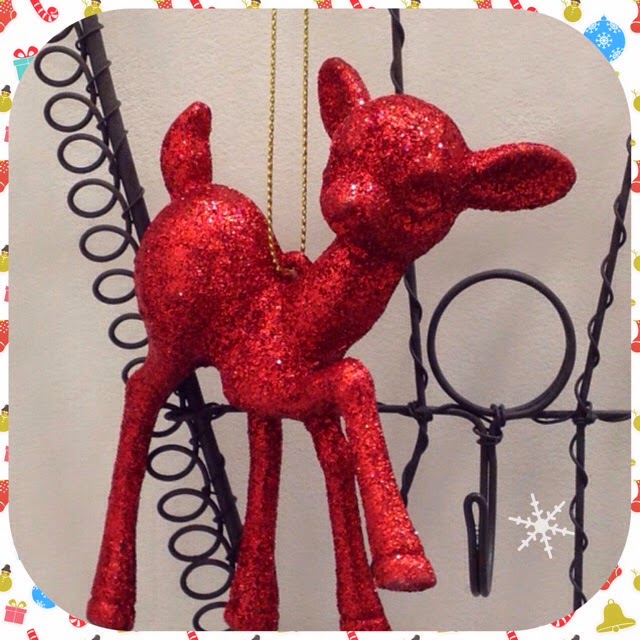
We popped in a couple of others shops in Covent Garden including Sass & Belle where I found some cute fawn/deer gift tags & wrapping paper. I can't resist any retro/kitsch  Baby Sham/Bambi type fawn/deer things.

Sass & Belle purchases


After not falling for the flattery from a bicycle rickshaw guy..."this must be your older sister" said to my daughter (Yeah, who are you kidding? Do we look gullible?)..... who wanted to recommend somewhere for us to eat (we guessed he was going to suggest somewhere far enough away that we would need a ride) we ate at Belgo, a Belgian restaurant. 

Belgo Beer Menu - we had a Fruli Strawberry


Then, satisfactorily stuffed we headed towards Theatre Royale, Drury Lane to see Charlie and the Chocolate Factory.
We had very good seats on the front row of the Royal Circle. It was a brilliant show. It was surprising it was not very busy. I can only guess it was because it is aimed at children & it was a school night.

Charlie and the Chocolate Factory


Following day we went to the Country Living Christmas Fair in Islington. This is my fourth time to this show. Lots of fantastic stands, so much I like and want but don't need. I also have a habit of telling myself "I could make one of those"! (Here are some pictures of my favourite stands (I forgot to take my own pictures) 


http://www.silverdashery.com/home/4582244057


http://www.charlottemacey.co.uk
http://wuandwu.com

http://www.coolcrafting.co.uk
https://www.etsy.com/uk/shop/mysweetfairy


And here are some of the things I bought (I can't show everything as some are Christmas presents)

Bird Feeder

Christmas Decorations


We spent the following day in Oxford Street starting in Primark near Tottenham Court Road Tube Station. Because we bought so much there we took the bags back to our hotel to save walking around with them all day. We walked almost the whole length of Oxford Street so by 7pm we were shopped out, and starving. We found Pizza Express in St Christopher's Place (which is down one of the back streets near Selfridges).  It was good to sit down & eat pizza, washed down with a Peroni. Didn't take long to fall asleep that night!

CHRISTMAS LIGHTS IN OXFORD STREET 2014


On our final morning we took the tube to Victoria as I was keen to visit HEMA in the Victoria Place Shopping centre. If you haven't heard of HEMA its a dutch shop selling all sorts of goodies such as food, stationery & make-up at quite cheap prices (you can order online too). It's not a very big store & not everything was to my liking but I picked up some sweets, a couple of birthday cards & cute deer/fawn Christmas decoration. 

From HEMA


I had to be careful about what else I bought as I already had so much stuff to get back on the train I really couldn't manage much more.

& these were just mine!


It was lovely to get away with my daughter and have some girlie time together.

Zx


Saturday, 1 November 2014

Halloween 2014

Halloween...I love carving pumpkins and decorating the house although I don't like answering the door. I live in a village with a small school where I used to know most of the children but on Halloween night it used to be hard trying to work out who they were behind their disguises. Now my children are no longer at the school I haven't got a clue who any of them are.  It's scary!

Anyway, here are some photos of our Halloween this year....Despicable Me!

Despicable Me theme


Lush Pumpkin Bubble Bar

This Lush Pumpkin was a gift, I thought it was a bath bomb so put the whole thing in the bath! Anyway, it smelt gorgeous, bubbled away, made the water orange and sparkly (it was covered in glitter). It was very "lush" and I felt wonderful in the bath and afterwards. Thank you Kariss from Shy, Strange and a little bit Manic 


Couldn't go to the party without a bottle of "Boos"!

Who's that watching us?

Despicable Me! Gru & Minions
Happy Belated Halloween

Zx